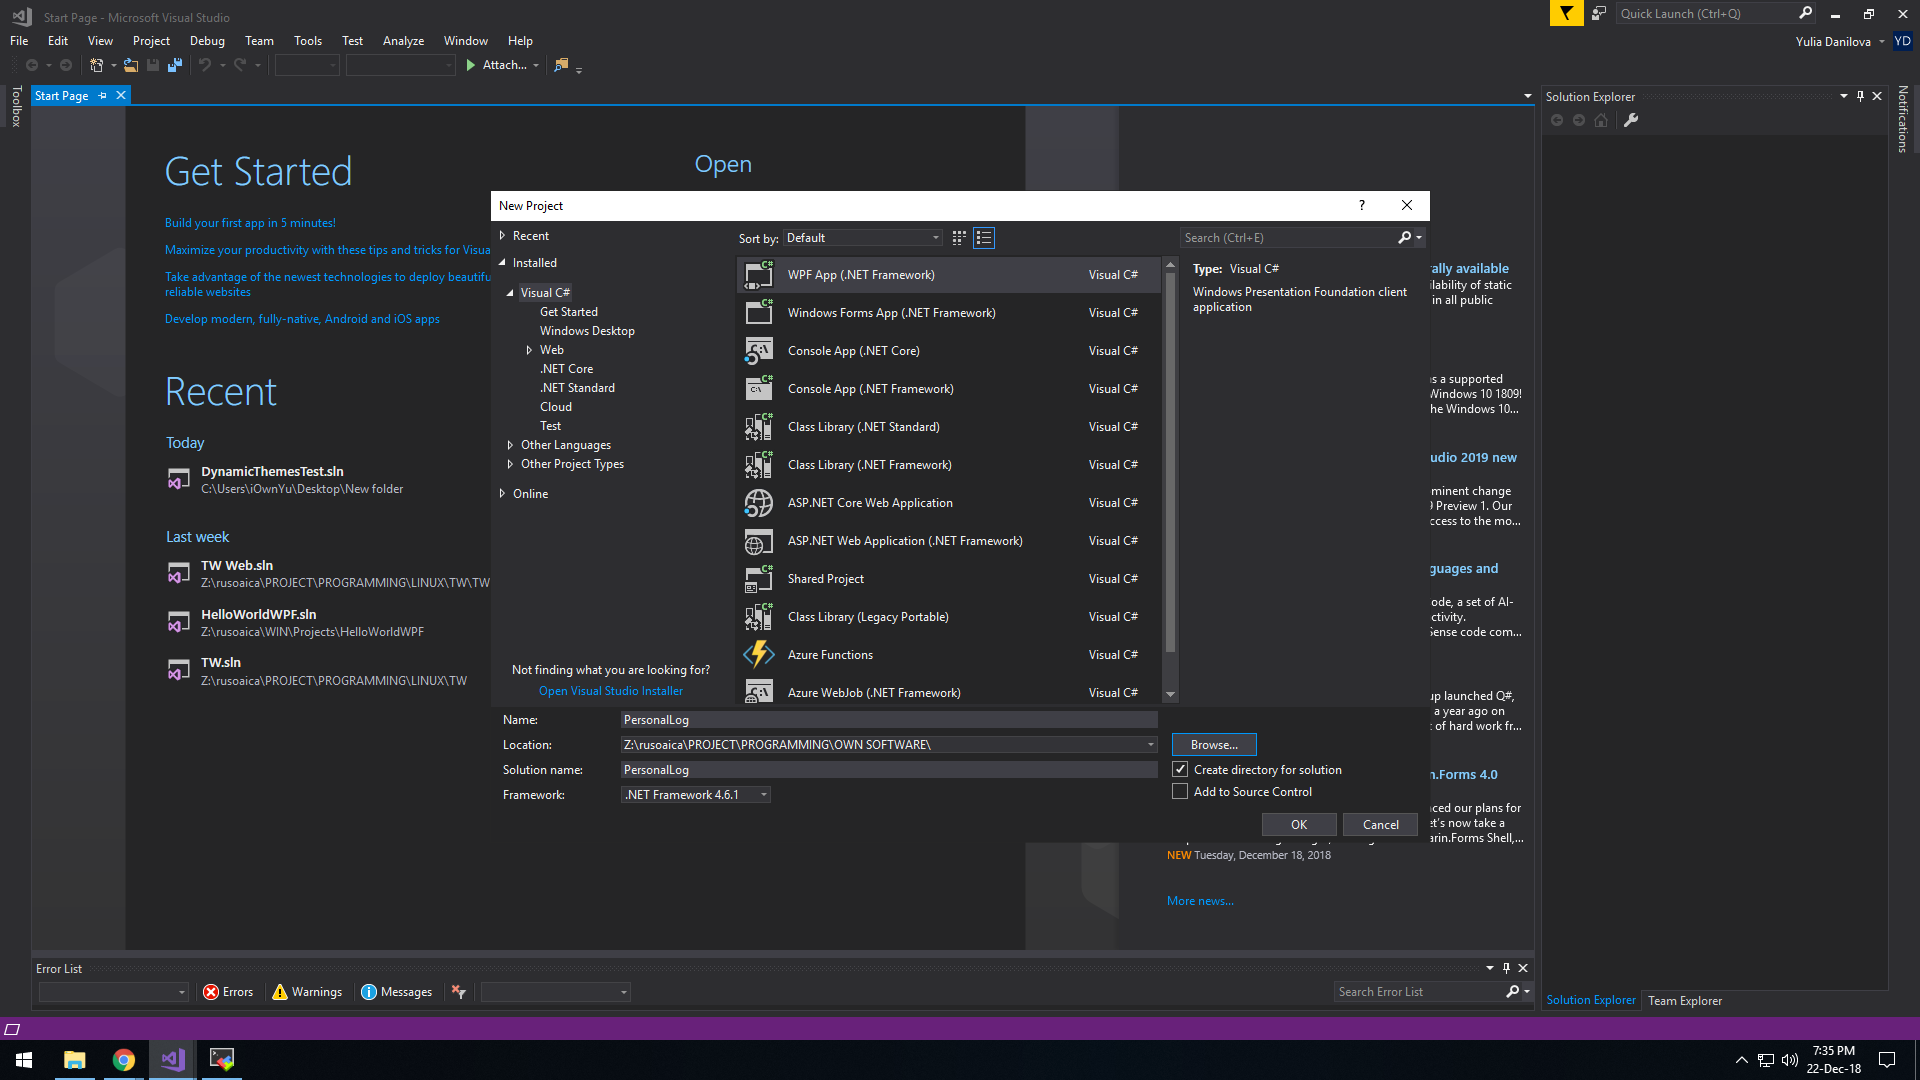
In the previous lessons, we dealt with the steps required to plan, design and research all the elements of our first complex application, and in this lesson we are going to start the first practical step of it: designing the user interface. I have already said that we will use XAML for this purpose, since it will allow us to customize it to a great extent, and it is also a modern form of workflow that allows us to separate the user interface from the backend logic. Just as I explained in the lesson where I introduced you to XAML, this will not be a lesson for teaching you XAML, the purpose of this blog is to teach you C# programming, not graphic design, so there might be aspects that you may not understand. To start with, let’s open Visual Studio and create a new C# WPF application. I will name mine PersonalLog. This is the template that you should chose:
Creating a WPF C# project
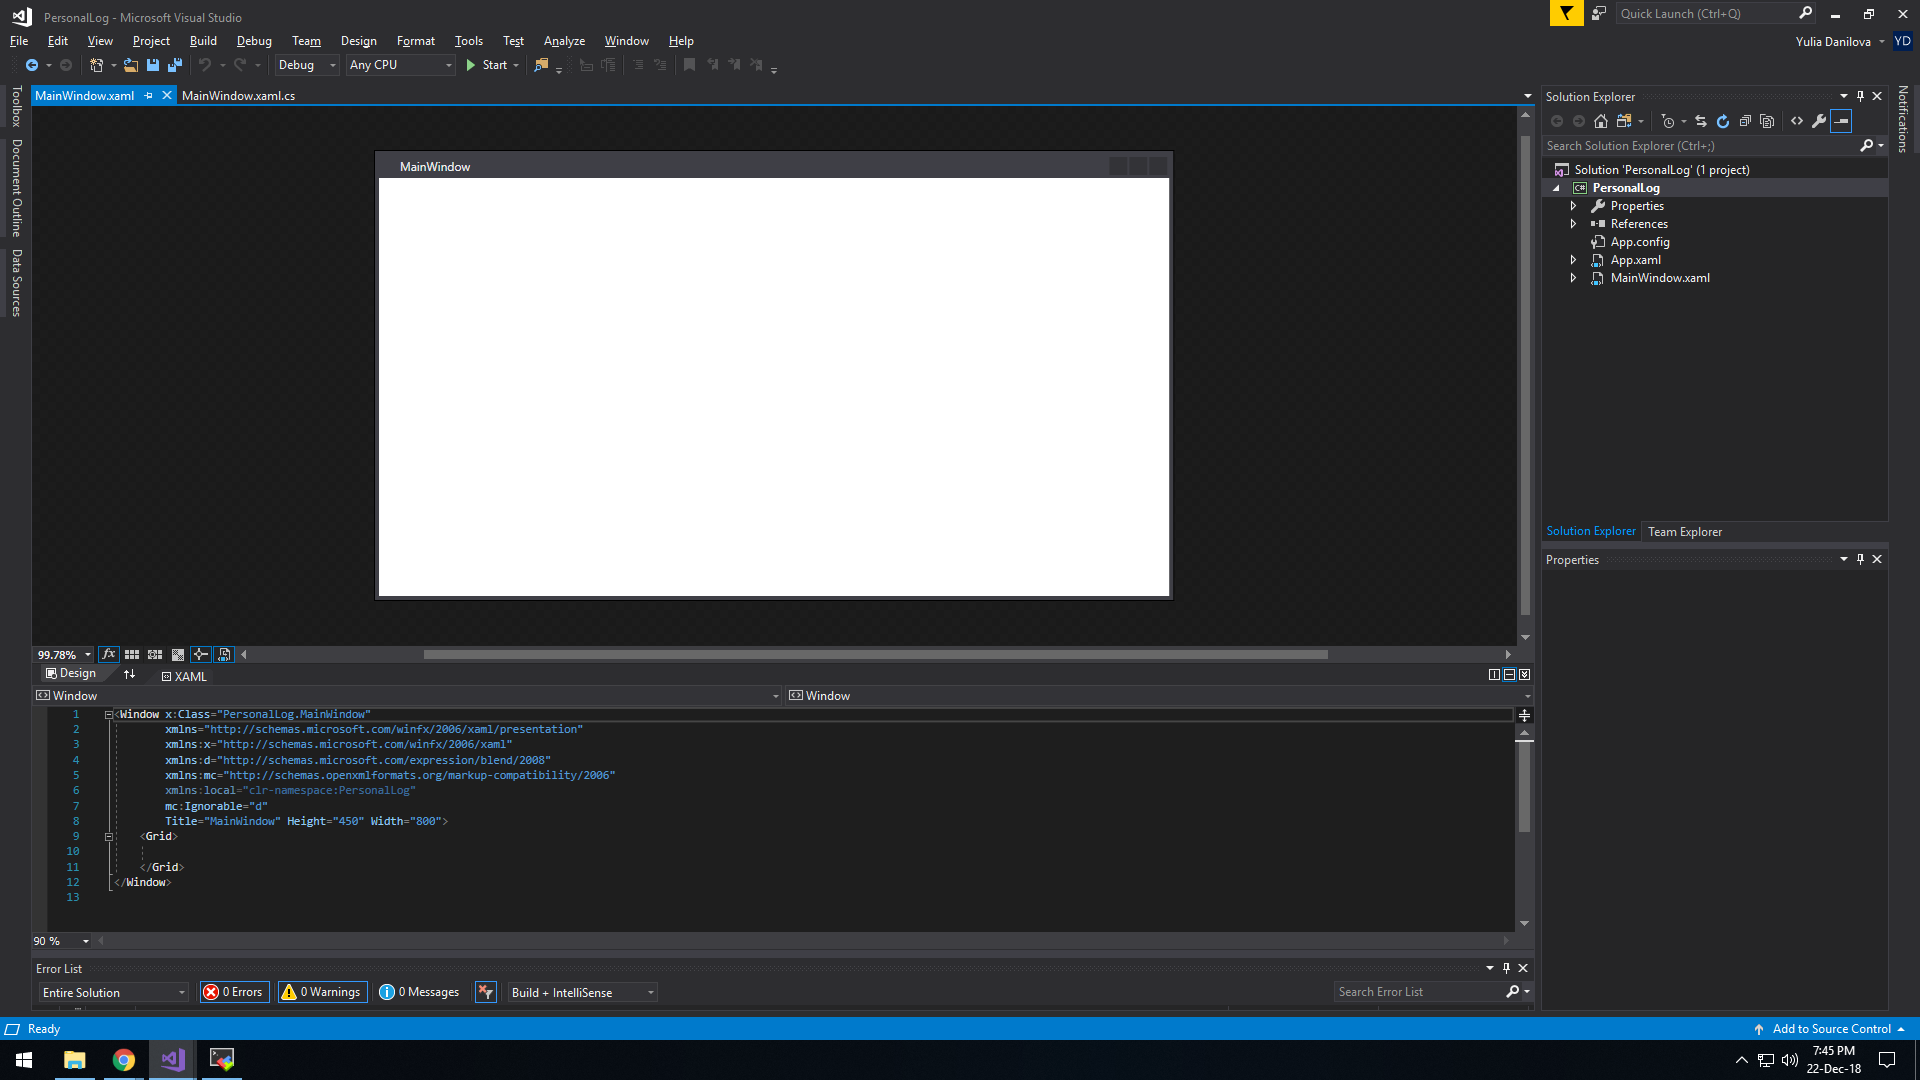
After the project is created, you will be presented with a blank window, and two files opened: MainWindow.xaml and MainWindow.xaml.cs; the first one contains the graphical user interface, written in XAML and also visually displayed:
XAML GUI
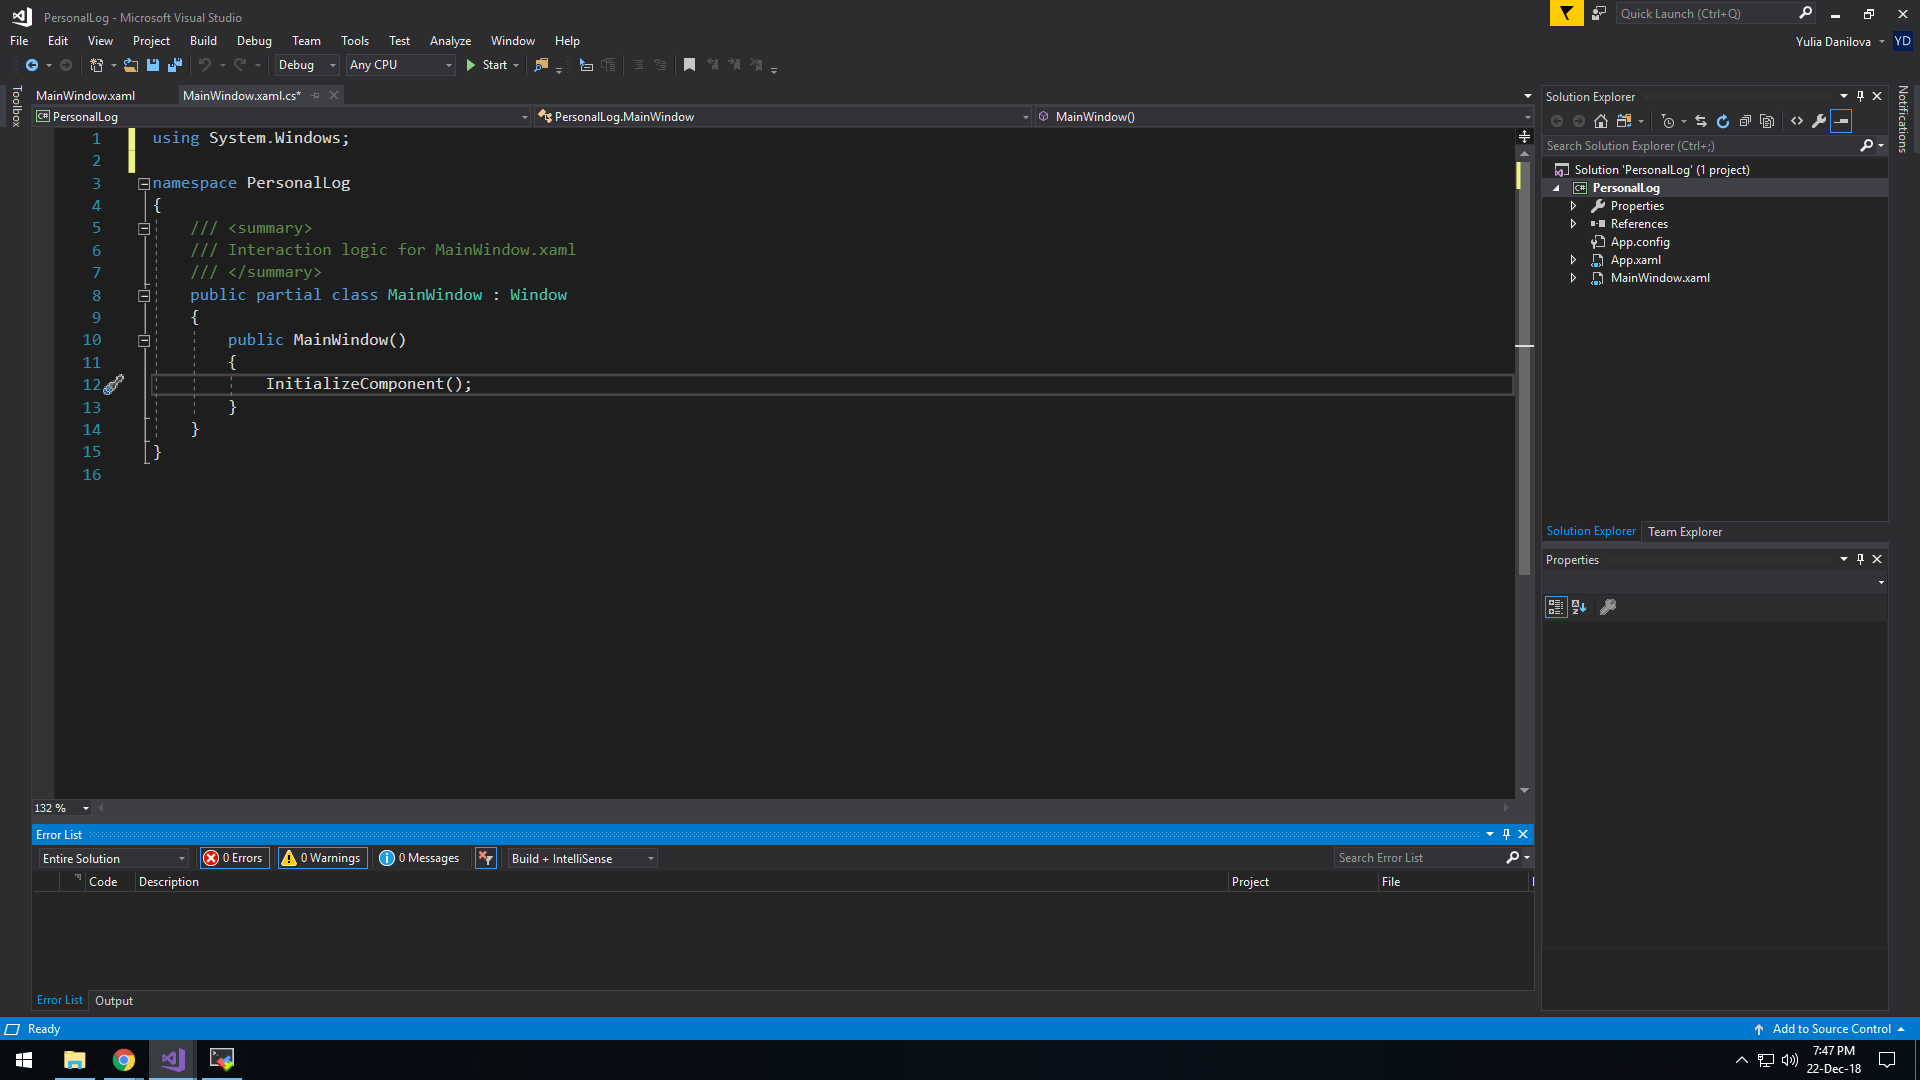
The other file is the one containing the programming logic of this window, written in C#:
C# logic of XAML window
There is another file that our project contains, App.xaml, and you can think of this file as one that will allow you to set general options for your application. This component is actually also made up of two files: App.xaml and App.xaml.cs, just like any other window. The exception here is that App.xaml is not actually a window, and it does not have a graphical representation. Its purpose is to host central application events, resources that can be used throughout the entire application, like brushes, etc. Inside App.xaml file, we also have codes that we can use to specify which is the first window to be displayed when our application starts. In our case, the file contains the following codes:
<Application x:Class="PersonalLog.App"
             xmlns="http://schemas.microsoft.com/winfx/2006/xaml/presentation"
             xmlns:x="http://schemas.microsoft.com/winfx/2006/xaml"
             xmlns:local="clr-namespace:PersonalLog"
             StartupUri="MainWindow.xaml">
    <Application.Resources>

    </Application.Resources>
</Application>
and it is quite obvious that MainWindow is the window that will be ran when we will run our program.
Since we are only going to design the GUI of our application in this lesson, we will not concern us with the .cs files where the C# codes are written. On the other side, we need to customize the look of our first window. Since we established that the first window will be a login screen, this is what we will do. At this point, the XAML codes of this window should look something like this:
<Window x:Class="PersonalLog.MainWindow"
        xmlns="http://schemas.microsoft.com/winfx/2006/xaml/presentation"
        xmlns:x="http://schemas.microsoft.com/winfx/2006/xaml"
        xmlns:d="http://schemas.microsoft.com/expression/blend/2008"
        xmlns:mc="http://schemas.openxmlformats.org/markup-compatibility/2006"
        xmlns:local="clr-namespace:PersonalLog"
        mc:Ignorable="d"
        Title="MainWindow" Height="450" Width="800">
    <Grid>

    </Grid>
</Window>
Change the title string to whatever you’d like to be displayed in the title bar of this window. For me, I will use “Personal Log – Authentication“. I will also modify the size of this application (width and height), set its startup location to the center of the screen, and disable resizing. At this point, the XAML will look like this:
<Window x:Class="PersonalLog.MainWindow"
        xmlns="http://schemas.microsoft.com/winfx/2006/xaml/presentation"
        xmlns:x="http://schemas.microsoft.com/winfx/2006/xaml"
        xmlns:d="http://schemas.microsoft.com/expression/blend/2008"
        xmlns:mc="http://schemas.openxmlformats.org/markup-compatibility/2006"
        xmlns:local="clr-namespace:PersonalLog"
        mc:Ignorable="d"
        Title="Personal Log - Authentication" Height="250" Width="400" ResizeMode="NoResize" WindowStartupLocation="CenterScreen">
    <Grid>

    </Grid>
</Window>
You can observe that the modifications were made inside the XAML tag of the Window element, which represents exactly our window. In the lesson about XAML, I was explaining that XAML is in a very remote way similar to HTML or XML, having a parent-child structure of elements, and each element has an opening and closing tag. This can be noticed here too: our Window element has a starting and a closing tag (<Window ….> … </Window>), and it is a parent element, containing a child one, a Grid, which also has a start and closing tag. This can be understood as the Window being the root visual element of our window (the parent), the one that contains all the other elements (its children).
In XAML, Window element can only contain one child. This means that we cannot place our buttons and labels and images and stuff directly inside it. If we tried so, the moment we would add a second children, we would get an error: The property “Content” can only be set once and The property ‘Content’ is set more than once. For this reason alone, XAML offers us so called container controls, such as the Grid. These controls are by default invisible in the visual window, and their purpose is only to allow us to host more controls and children inside elements that would normally only allow one. You can learn more about the types of controls XAML offers in this lesson.
The next step is to place all the controls we need inside the Grid container control. For the login window, we need 3 labels, one textbox, one password field, two checkboxes and two buttons, as planned in our previous lesson. You can either add them by dragging and dropping them from the Visual Studio Toolbox panel on the left, or by writing the XAML codes directly. After adding them, we will end up with XAML codes close to this:
<Window x:Class="PersonalLog.MainWindow"
        xmlns="http://schemas.microsoft.com/winfx/2006/xaml/presentation"
        xmlns:x="http://schemas.microsoft.com/winfx/2006/xaml"
        xmlns:d="http://schemas.microsoft.com/expression/blend/2008"
        xmlns:mc="http://schemas.openxmlformats.org/markup-compatibility/2006"
        xmlns:local="clr-namespace:PersonalLog"
        mc:Ignorable="d"
        Title="Personal Log - Authentication" Height="250" Width="400" ResizeMode="NoResize" WindowStartupLocation="CenterScreen">
    <Grid>
        <Label/>
        <Label/>
        <Label/>
        <TextBox/>
        <PasswordBox/>
        <CheckBox/>
        <CheckBox/>
        <Button/>
        <Button/>
    </Grid>
</Window>
The only problem now is that all the controls are overlapping, because we haven’t set any properties to them, like the size, position, the anchoring, etc. Let’s do that too:
<Window x:Class="PersonalLog.MainWindow"
        xmlns="http://schemas.microsoft.com/winfx/2006/xaml/presentation"
        xmlns:x="http://schemas.microsoft.com/winfx/2006/xaml"
        xmlns:d="http://schemas.microsoft.com/expression/blend/2008"
        xmlns:mc="http://schemas.openxmlformats.org/markup-compatibility/2006"
        xmlns:local="clr-namespace:PersonalLog"
        mc:Ignorable="d"
        Title="Personal Log - Authentication" Height="232" Width="400" ResizeMode="NoResize" WindowStartupLocation="CenterScreen">
    <Grid>
        <Label Content="Username" Height="25" VerticalAlignment="Top" Margin="10,23,0,0" HorizontalAlignment="Left" Width="68"/>
        <Label Content="Password" Margin="10,58,0,0" HorizontalAlignment="Left" Width="68" Height="24" VerticalAlignment="Top"/>
        <Label Content="Forgot password?" Height="25" VerticalAlignment="Bottom" Margin="0,0,81,10" HorizontalAlignment="Right" Width="104" Foreground="#FF002EFF" Cursor="Hand"/>
        <TextBox Height="25" VerticalAlignment="Top" Margin="83,23,10,0" VerticalContentAlignment="Center"/>
        <PasswordBox Margin="83,58,10,0" Height="25" VerticalAlignment="Top" VerticalContentAlignment="Center"/>
        <CheckBox Content="Remember username and password" Height="20" Margin="10,87,10,0" VerticalAlignment="Top" VerticalContentAlignment="Center"/>
        <CheckBox Content="Sign in automatically" Margin="10,112,10,0" Height="20" VerticalAlignment="Top" VerticalContentAlignment="Center"/>
        <Button Content="Register" Margin="0,0,100,40" HorizontalAlignment="Right" Width="85" Height="28" VerticalAlignment="Bottom"/>
        <Button Content="Sign in" Margin="0,0,10,40" HorizontalAlignment="Right" Width="85" Height="28" VerticalAlignment="Bottom"/>
    </Grid>
</Window>
If we run the program right now, we would be presented with the following window:
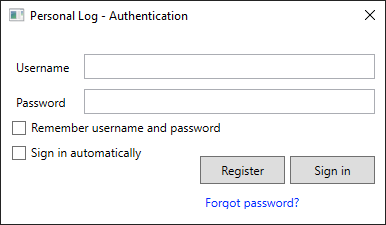
XAML Login Window
In the same manner we will design the next windows of our program. To do so, right click on the name of our project, inside the Solution Explorer panel, on the right side of Visual Studio. Pay attention to right click on the project name, not the solution one. In the menu that appears, click Add – Window.
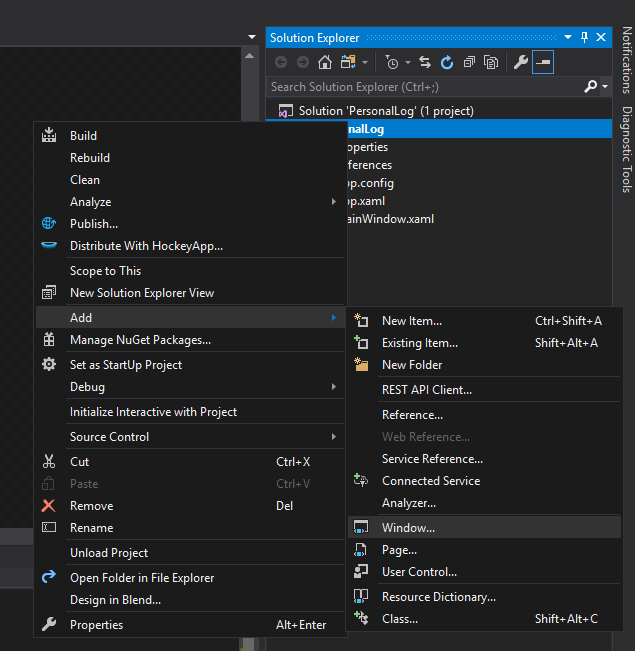
Visual Studio – Add new window
Name this new window Registration. Now, you will notice that our project contains a new file named Registration.xaml:
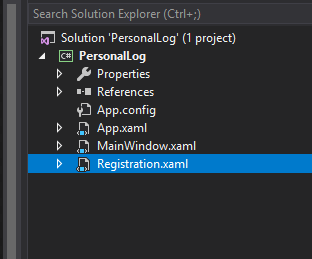
Visual Studio new file
If we expand the small arrow on the left of the file name, we will also see the Registration.xaml.cs file, the one that contains the logic written in C# of this new window. In other words, this is a method through which we can access the UI/logic files of any window of our application.
Like before, we will add the visual controls that this new window will contain:
<Window x:Class="PersonalLog.Registration"
        xmlns="http://schemas.microsoft.com/winfx/2006/xaml/presentation"
        xmlns:x="http://schemas.microsoft.com/winfx/2006/xaml"
        xmlns:d="http://schemas.microsoft.com/expression/blend/2008"
        xmlns:mc="http://schemas.openxmlformats.org/markup-compatibility/2006"
        xmlns:local="clr-namespace:PersonalLog"
        mc:Ignorable="d"
        Title="Personal Log - Registration" Height="230" Width="400" ResizeMode="NoResize" WindowStartupLocation="CenterScreen">
    <Grid>
        <Label Content="Username" Height="25" VerticalAlignment="Top" Margin="10,10,0,0" HorizontalAlignment="Left" Width="108"/>
        <Label Content="Password" Margin="10,41,0,0" HorizontalAlignment="Left" Width="108" Height="24" VerticalAlignment="Top"/>
        <Label Content="Repeat Password" Margin="10,71,0,0" HorizontalAlignment="Left" Width="108" Height="24" VerticalAlignment="Top"/>
        <Label Content="Security Question" Margin="10,101,0,0" HorizontalAlignment="Left" Width="108" Height="24" VerticalAlignment="Top"/>
        <Label Content="Security Answer" Margin="10,131,0,0" HorizontalAlignment="Left" Width="108" Height="24" VerticalAlignment="Top"/>
        <TextBox Height="25" VerticalAlignment="Top" Margin="123,10,10,0" VerticalContentAlignment="Center"/>
        <PasswordBox Margin="123,40,10,0" Height="25" VerticalAlignment="Top" VerticalContentAlignment="Center"/>
        <PasswordBox Margin="123,70,10,0" Height="25" VerticalAlignment="Top" VerticalContentAlignment="Center"/>
        <TextBox Height="25" VerticalAlignment="Top" Margin="123,100,10,0" VerticalContentAlignment="Center"/>
        <TextBox Height="25" VerticalAlignment="Top" Margin="123,130,10,0" VerticalContentAlignment="Center"/>
        <Button Content="Cancel" Margin="0,0,100,10" HorizontalAlignment="Right" Width="85" Height="28" VerticalAlignment="Bottom"/>
        <Button Content="Register" Margin="0,0,10,10" HorizontalAlignment="Right" Width="85" Height="28" VerticalAlignment="Bottom"/>
    </Grid>
</Window>
Which will produce this window:
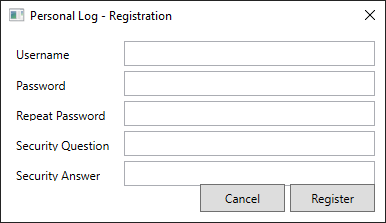
XAML Registration window
Add a new window and name it PasswordRecovery. Its purpose should be inferred quite obviously from the name. This new window is defined by the following XAML code:
<Window x:Class="PersonalLog.PasswordRecovery"
        xmlns="http://schemas.microsoft.com/winfx/2006/xaml/presentation"
        xmlns:x="http://schemas.microsoft.com/winfx/2006/xaml"
        xmlns:d="http://schemas.microsoft.com/expression/blend/2008"
        xmlns:mc="http://schemas.openxmlformats.org/markup-compatibility/2006"
        xmlns:local="clr-namespace:PersonalLog"
        mc:Ignorable="d"
        Title="Personal Log - Password Recovery" Height="193" Width="400" ResizeMode="NoResize" WindowStartupLocation="CenterScreen">
    <Grid>
        <Label Content="" Margin="10,21,0,96" HorizontalAlignment="Left" Width="374" HorizontalContentAlignment="Center"/>
        <PasswordBox Margin="10,82,10,0" Height="25" VerticalAlignment="Top" VerticalContentAlignment="Center"/>
        <Button Content="Cancel" Margin="0,0,100,10" HorizontalAlignment="Right" Width="85" Height="28" VerticalAlignment="Bottom"/>
        <Button Content="Recover" Margin="0,0,10,10" HorizontalAlignment="Right" Width="85" Height="28" VerticalAlignment="Bottom"/>
    </Grid>
</Window>
and will look like this:
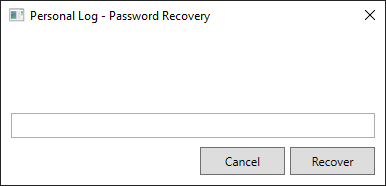
XAML Password recovery window
The reason why we placed no text in our middle screen label is the fact that this control will actually display the user chosen security question.
Next window will simply be named Options:
<Window x:Class="PersonalLog.Options"
        xmlns="http://schemas.microsoft.com/winfx/2006/xaml/presentation"
        xmlns:x="http://schemas.microsoft.com/winfx/2006/xaml"
        xmlns:d="http://schemas.microsoft.com/expression/blend/2008"
        xmlns:mc="http://schemas.openxmlformats.org/markup-compatibility/2006"
        xmlns:local="clr-namespace:PersonalLog"
        mc:Ignorable="d"
        Title="Personal Log - Options" Height="232" Width="400" ResizeMode="NoResize" WindowStartupLocation="CenterScreen">
    <Grid>
        <Label Content="Path to save log files" Height="25" VerticalAlignment="Top" Margin="10,23,0,0" HorizontalAlignment="Left" Width="121"/>
        <Label Content="Font size" Margin="10,53,0,0" HorizontalAlignment="Left" Width="121" Height="24" VerticalAlignment="Top"/>
        <Label Content="User Theme" Margin="10,82,0,0" HorizontalAlignment="Left" Width="121" Height="24" VerticalAlignment="Top"/>
        <TextBox Height="25" VerticalAlignment="Top" Margin="136,23,100,0" VerticalContentAlignment="Center"/>
        <TextBox Height="25" VerticalAlignment="Top" Margin="136,53,100,0" VerticalContentAlignment="Center"/>
        <ComboBox Margin="136,83,100,0" Height="23" VerticalAlignment="Top"/>
        <CheckBox Content="Remember username and password" Height="20" Margin="10,111,100,0" VerticalAlignment="Top" VerticalContentAlignment="Center"/>
        <CheckBox Content="Sign in automatically" Margin="10,136,100,0" Height="20" VerticalAlignment="Top" VerticalContentAlignment="Center"/>
        <Button Content="Browse" Margin="0,23,10,0" HorizontalAlignment="Right" Width="85" Height="25" VerticalAlignment="Top"/>
        <Button Content="Cancel" Margin="0,0,100,10" HorizontalAlignment="Right" Width="85" Height="28" VerticalAlignment="Bottom"/>
        <Button Content="Save" Margin="0,0,10,10" HorizontalAlignment="Right" Width="85" Height="28" VerticalAlignment="Bottom"/>
    </Grid>
</Window>
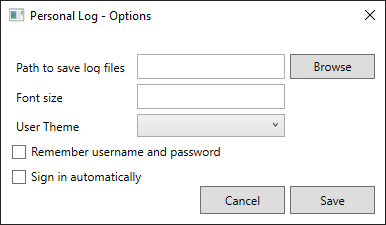
XAML Options window
The final window that we will add to our application is actually the main window that will be displayed after logging in, the place where all the action will take place. I named mine Log, and its XAML codes are the following:
<Window x:Class="PersonalLog.Log"
        xmlns="http://schemas.microsoft.com/winfx/2006/xaml/presentation"
        xmlns:x="http://schemas.microsoft.com/winfx/2006/xaml"
        xmlns:d="http://schemas.microsoft.com/expression/blend/2008"
        xmlns:mc="http://schemas.openxmlformats.org/markup-compatibility/2006"
        xmlns:local="clr-namespace:PersonalLog"
        mc:Ignorable="d"
        Title="Personal Log" Height="720" Width="1366" WindowStartupLocation="CenterScreen" WindowState="Maximized">
    <Grid Background="#FF1E1E1E" >
        <Menu Background="#FFA9D1F4" DockPanel.Dock="Top" Height="20" VerticalAlignment="Top">
            <MenuItem Header="File">
                <MenuItem Header="New Log"/>
                <MenuItem Header="Save Log"/>
                <MenuItem Header="Exit"/>
            </MenuItem>
            <MenuItem Header="Edit">
                <MenuItem Header="Cut"/>
                <MenuItem Header="Copy"/>
                <MenuItem Header="Paste"/>
                <MenuItem Header="Delete"/>
                <MenuItem Header="Select All"/>
            </MenuItem>
            <MenuItem Header="View">
                <MenuItem Header="Search Logs"/>
                <MenuItem Header="Display dates containing logs"/>
            </MenuItem>
            <MenuItem Header="Tools">
                <MenuItem Header="Options"/>
            </MenuItem>
            <MenuItem Header="Logs">
                <MenuItem Header="Delete Log"/>
                <MenuItem Header="Delete All Logs"/>
            </MenuItem>
            <MenuItem Header="Help">
                <MenuItem Header="About"/>
            </MenuItem>
        </Menu>
        <TextBox Margin="10,25,206,10"/>
        <Calendar Margin="0,25,10,0" HorizontalAlignment="Right" Width="191" Height="182" VerticalAlignment="Top"/>
        <Label Content="Search Logs" Height="24" VerticalAlignment="Top" Margin="1162,274,0,0" HorizontalAlignment="Left" Width="77" Foreground="White"/>
        <TextBox Height="25" VerticalAlignment="Top" Margin="0,303,10,0" VerticalContentAlignment="Center" HorizontalAlignment="Right" Width="186"/>
        <Button Content="Search" Margin="0,342,10,0" HorizontalAlignment="Right" Width="71" Height="20" VerticalAlignment="Top"/>
    </Grid>
</Window>
Which will output the following graphical representation:

Personal Log main window
I know the calendar doesn’t look like the one I showed in the lesson when I planned the design of the application, but this is simply because we first need to create the XAML calendar control, which will come in the next lesson. For now, I used the stock WPF calendar, as a placeholder.
Tags: designing, graphical user interface, GUI, writing first program, XAML

